Some links on this site may be affiliate links. Thank you for your support (•ᵕᴗᵕ•)⁾⁾
This guide explains how to cook fluffy, delicious Japanese white rice using a rice cooker—perfect for beginners!
Sponsored Links
Clickable Table of Contents
Basic Recipe: How to Cook White Rice in a Rice Cooker
Ponkuma
Step-by-step photos included! If you’re a beginner, feel free to switch tabs and take a look♪
Ingredients
Ingredient
Amount
White rice
2 cups (about 300g)
Water
Up to the 2-cup line in your rice cooker
Ponkuma
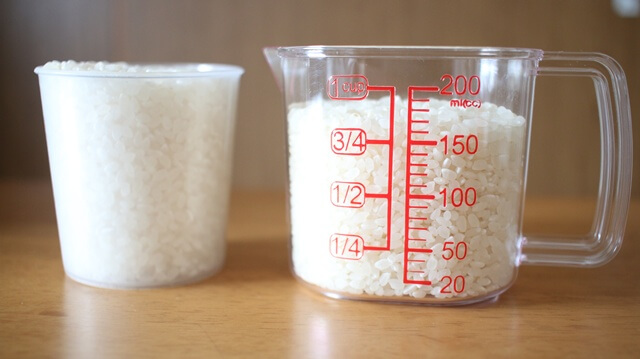
There are two types of measuring cups! A standard measuring cup = 200ml, but a rice measuring cup = 180ml. If you only have a 200ml cup, fill it to the 180ml line to measure 1 cup .
Instructions
A regular cooking measuring cup is 200ml. But a rice measuring cup is 180ml.
If you only have a 200ml cup, fill it up to the 180ml mark to measure one gō (a traditional Japanese rice measurement).
Instructions
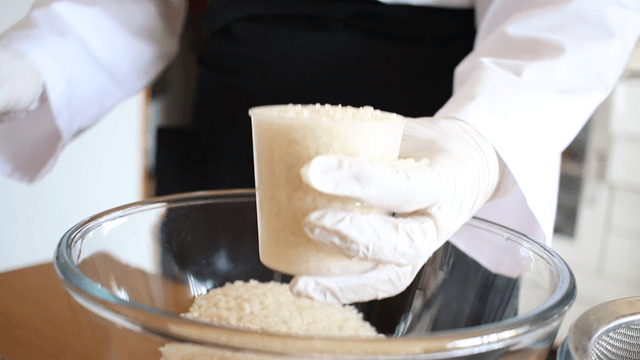
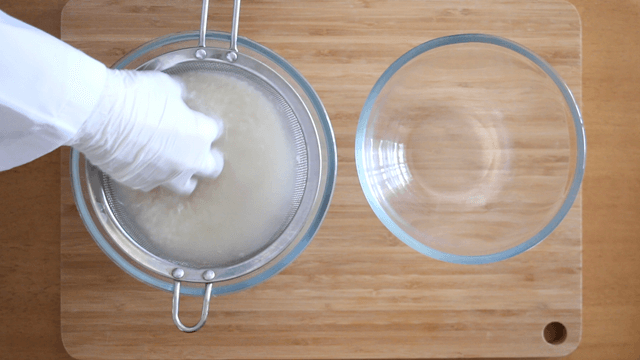
Measure one level cup of rice using a measuring cup (1 go = 180ml / about 150g), and place it in a strainer.
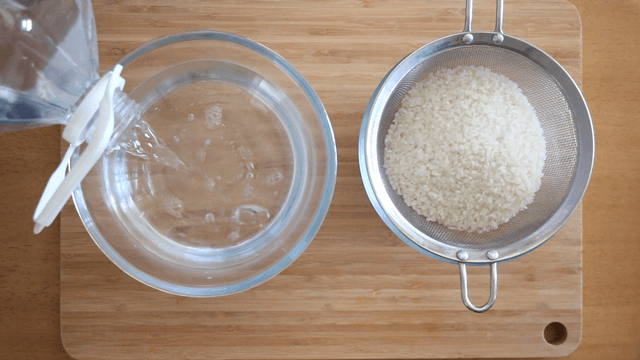
Fill a bowl with water, put the rice with the strainer into the water all at once, then quickly lift it out and drain the water.
Gently rinse the rice 2 to 3 times.
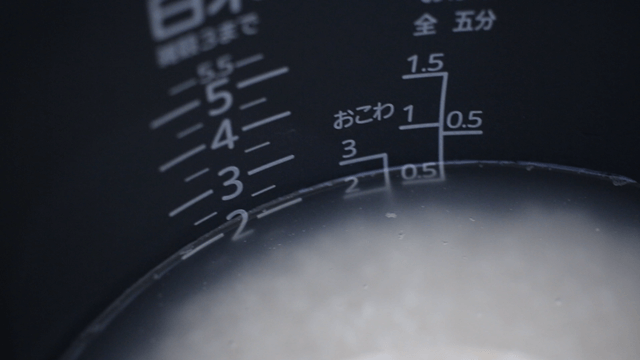
Transfer the rice into the rice cooker pot, then add water up to the white rice level mark according to the amount.
【Water adjustment tips▼】 ・For new rice: use slightly less water than the mark ・For no-wash rice: add 1 to 2 tablespoons more water per 1 go ・For old rice: add 1 to 2 tablespoons more water per 1 go
Let the rice soak. (Summer: 30 minutes / Winter: 1 to 2 hours)
Turn on the rice cooker.
When cooking is finished, immediately fluff the rice gently from the bottom with a rice paddle.
Ingredients
Ingredient
Amount
White rice
2 cups (about 300g)
Water
Up to the 2-cup line in your rice cooker
Ponkuma
There are two types of measuring cups! A standard measuring cup = 200ml, but a rice measuring cup = 180ml. If you only have a 200ml cup, fill it to the 180ml line to measure 1 cup .
Instructions
A regular cooking measuring cup is 200ml. But a rice measuring cup is 180ml.
If you only have a 200ml cup, fill it up to the 180ml mark to measure one gō (a traditional Japanese rice measurement).
Instructions
STEP
Use a rice measuring cup to level off exactly 1 cup (180ml / approx. 150g) of uncooked rice and place it in a strainer.
※If you only have a 200ml measuring cup, fill it up to the 180ml line to get an accurate 1 cup (1合) of rice.
STEP
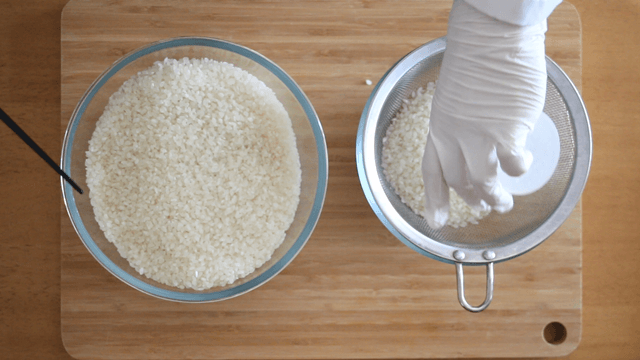
Fill a large bowl with water and submerge the rice-filled strainer into it. Immediately lift the rice out and discard the water.
The first rinse is important! Rice absorbs water quickly, and if you leave it too long, it can take in unwanted odors from rice bran (nuka). So change the water right away!
STEP
Wash the rice gently 2 to 3 times.
(Thanks to modern milling techniques, just lightly swirling the rice and changing the water is enough.)
STEP
Transfer the washed rice into the rice cooker bowl and fill with water up to the corresponding “white rice” line based on your rice amount
(※If your rice cooker doesn’t have a water line, use 200ml of water per 180ml (1 cup) of rice as a general guide.)
Water Adjustment Tips
New rice (shinmai): Slightly less water than the line, since it contains more moisture naturally.
No-rinse rice (musenmai): Add 1–2 tablespoons more water per cup.
Old rice: Add 1–2 tablespoons more water per cup, as it’s drier and needs more to rehydrate.
STEP
Let the rice soak before cooking:
Summer: 30 minutes
Winter: 1 to 2 hours
Older rice types benefit from soaking for the full 1–2 hours to improve texture and flavor.
Quick Tip
If the room temperature is over 18°C (64°F), bacteria can multiply within 4 hours.
If you’re not cooking right away, it’s safest to soak the rice in the refrigerator.
However, don’t leave it soaking too long—drain the rice and cover it with a lid or plastic wrap to avoid drying out or picking up odors.
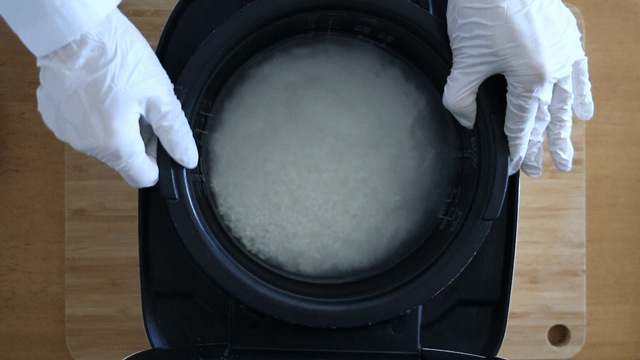
STEP
Start Cooking
Check that your rice cooker is set to “white rice” mode, then press the start button.
STEP
Fluff the Rice
Once the rice is cooked, let it sit for about 10 minutes if you’re using an older rice cooker. Then gently fluff it with a rice paddle from the bottom. This resting time helps the moisture distribute evenly, giving you light, fluffy rice every time.
Quick Tip
Try to eat the rice within 3 hours if you’re keeping it warm in the rice cooker. → Leaving it for more than 6 hours can affect the flavor and also waste electricity.
Storing rice at room temperature? Here’s a general guide: Summer: Up to 6 hours/Spring & Autumn: Up to 12 hours/Winter: 1 to 2 days
※hese are just rough estimates. Temperature, humidity, and your own health condition can also make a difference.
Avoid storing cooked rice in the fridge! → Cold temperatures (2–4°C / 35–39°F) actually cause rice to harden and lose flavor due to starch deterioration.
Best storage method? → Freeze it quickly, and reheat it in the microwave all at once for the best texture and taste.
Avoid storing cooked rice in the refrigerator! → The temperature range of 2–4°C (36–39°F) actually speeds up rice staling by accelerating starch deterioration.
The best way to store rice? → Freeze it quickly and reheat all at once in the microwave for the best texture and flavor.


 Ponkuma